

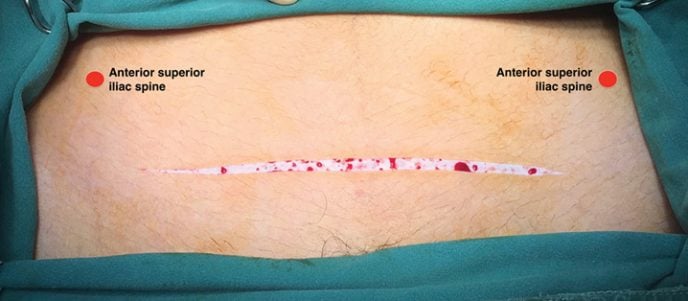
Step 1. The placement of the incision is decided by both the examination under anesthesia and the expected pathology. In general, it is about three fingerbreadths above the symphysis pubis. The initial incision, with a scalpel, goes only through the skin itself.
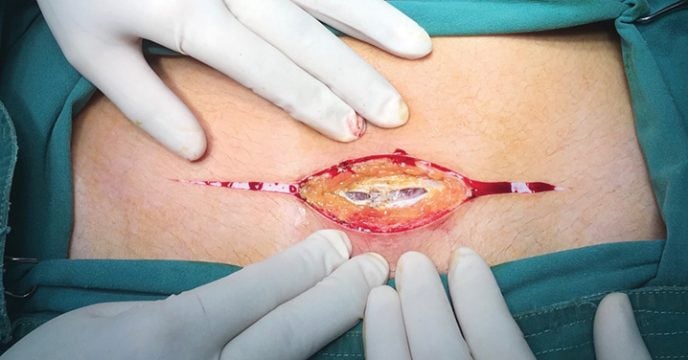
Step 2. Using electrocautery, the subcutaneous fat is incised in the midline to the rectus sheath. Small incisions are made on either side of the midline to reveal the rectus muscle. We do not divide the linea alba at this time.
Step 3. A large clamp is inserted beneath the rectus sheath, elevating it from the muscle. The subcutaneous tissues and the sheath are incised on each side with electrocautery. The incision ends at the lateral border of the rectus muscle.
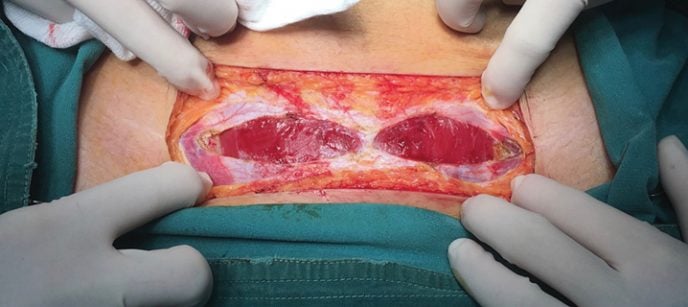
Step 4. Both rectus muscles are now exposed. There is usually a small amount of fat visible lateral to the muscles. If more exposure is needed, the incision can be extended into the fascia of the oblique and transverse muscles, though this slightly increases the risk of damage to the iliofemoral and ilioinguinal nerves.
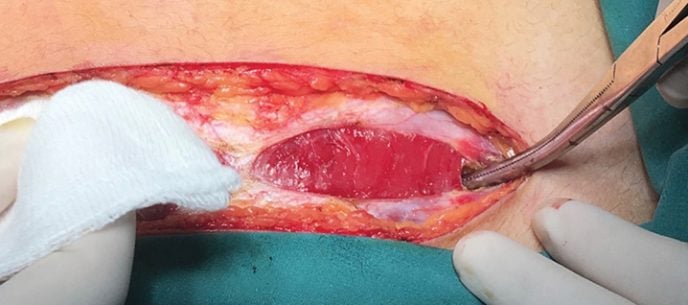
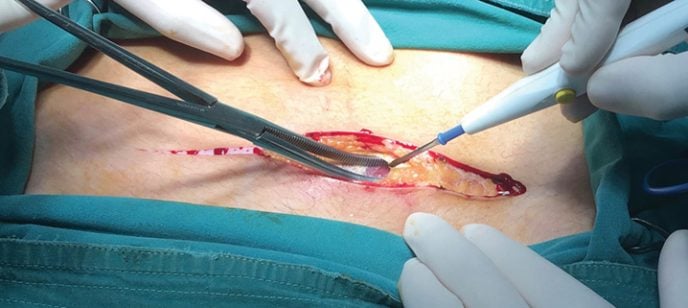
Step 5. A clamp is inserted under the rectus muscle and tracks on the surface of the transversalis fascia. It should initially be pointed in a perpendicular direction and then parallel to the muscle. We choose to start laterally as it increases the chance of elevating the inferior epigastric vessels with the muscle and reduces the chance of damaging the vessels.

Step 6. The point of the clamp is brought out through the rectus muscle a centimeter or so lateral to the midline. Avoiding the midline at this stage allows the muscles to be divided without troublesome bleeding.
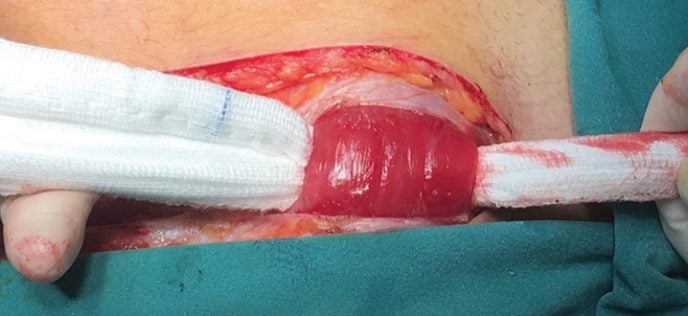
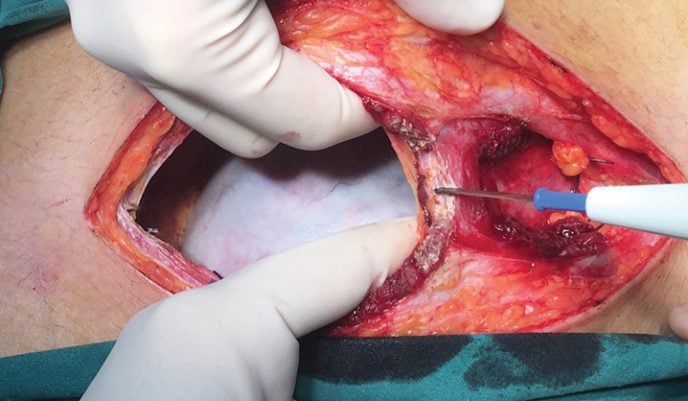
Step 7. The clamp is opened and the corner of a clean, dry laparotomy sponge grasped and pulled beneath the muscle, exiting laterally. The sponge must be dry to avoid transmission of current from the electrocautery. Elevation of the muscle allows easy and safe division to be performed. The muscle is cut with long steady strokes. Small bleeding points should be ignored and most will stop bleeding spontaneously. Do not ‘chase’ bleeders with diathermy as they will retreat into the muscle and bleed more.
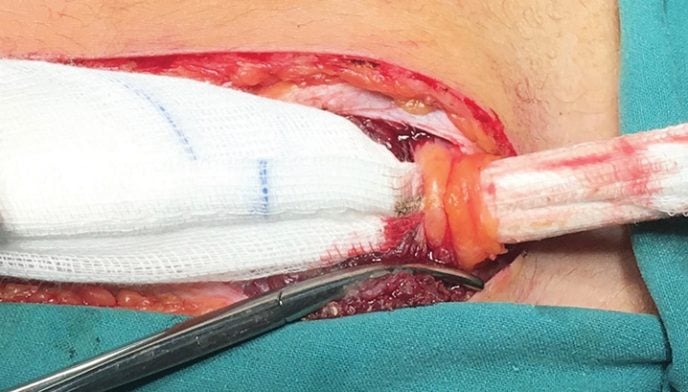
Step 8. In most cases, the inferior epigastric vessels will be seen with encircling fat toward the lateral margins of the muscle and can be grasped with artery forceps, cut and tied. Some texts suggest suture ligation, but that is not wise as the vessels can be easily damaged.
Step 9. In some cases, the vessels will be left lying on the surface of the transversalis fascia and they can be carefully elevated using artery forceps, clamped, divided and ligated.
Step 10. The abdominal cavity is opened laterally on the right side and, under direct vision, the peritoneum. The medial portions of the rectus muscle and the linea alba are divided with the peritoneum. There is often a small amount of bleeding in the midline but it usually stops once the incision is fully opened.
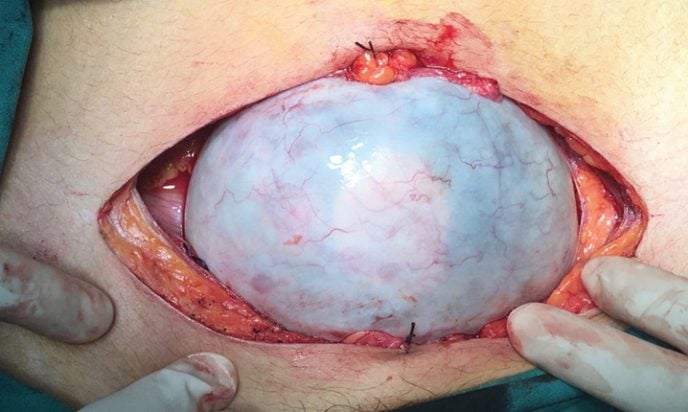
Step 11. The peritoneum in the midline superiorly and inferiorly is sewn to the skin.
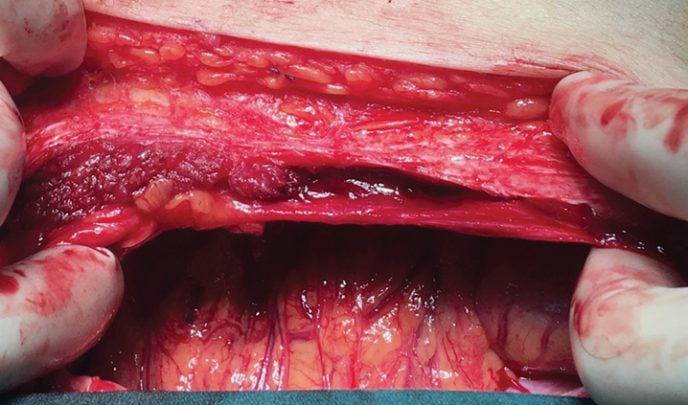
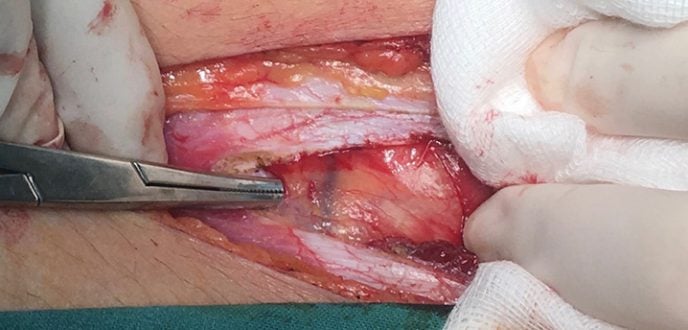
Step 12. In this case, there is bleeding from the belly of the rectus. The muscle has retracted somewhat into the sheath and will do so to a greater degree if attempts are made to secure the vessels concerned.
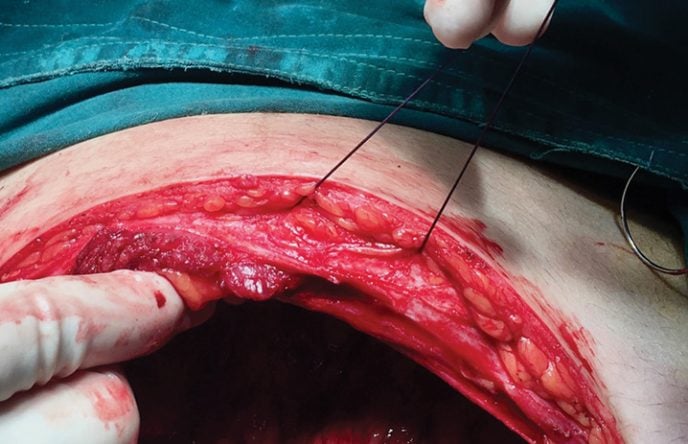
Step 13. Instead of trying to find and control the vessels, a large mattress suture is passed through the fascia, muscle and peritoneum on one side of the bleeding area, across the peritoneum and then out through the peritoneum, muscle and fascia. It is tied firmly to stop the bleeding, but not so strongly as to strangulate the muscle.
3 Comments
Leave a Reply


Thank you so much for sharing! Excellent work!
Great discussion. I thought too much cautery destroys capillaries with inherent delay of healing??
Thank you!!!